Personal blog of Yvo von Berg: Pipeline TD / CG Toolsmith / tools programmer. My place to share my weird experiments with code and 3D. And making virtual rollercoasters.
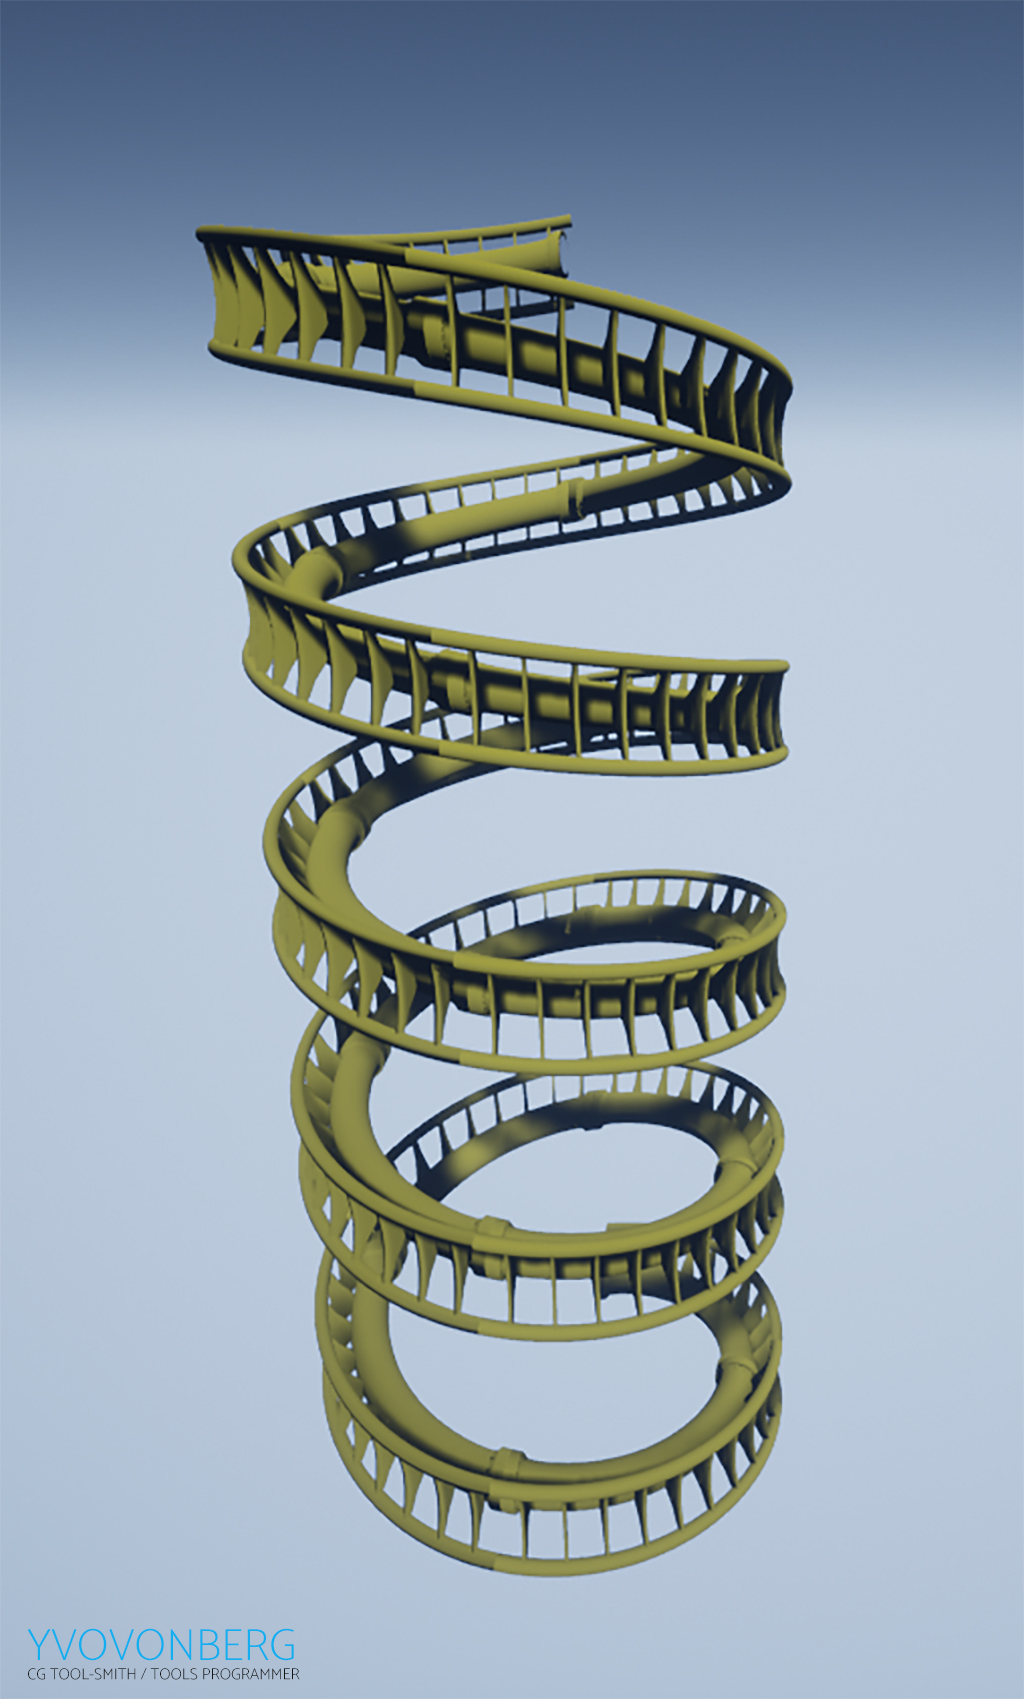
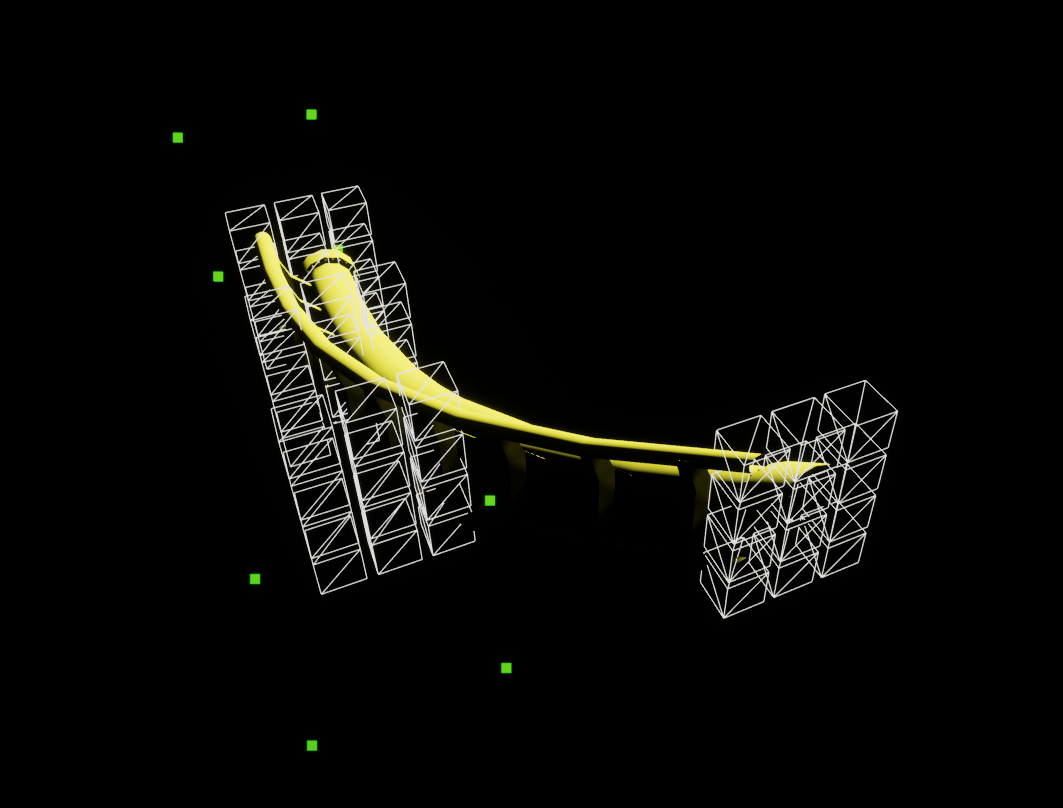
Taking the prototype further by adding multiple pieces, I’m applying the same technique I used in Max:
I create a base actor which is the actual piece.
That has an extra component which works like an anchor (locator at the end of each piece).
I store the normal of the anchor component, the next actor in the row will ask the previous actor for it’s normal.
In this prototype I just add another offset in the other axis. (Quick hack so I can do some cool spirals and loops at least yay).
That is going to be the next step, full directional control just like the deformer in Max.
So my original goal starting this project was to create a port of my original tool that I made for 3Ds Max ( Tycoon ).
That tool is basically an extension of the existing bend deformer in Max, for the Unreal version I had no existing deformer.
My first idea was actually to just deform a point in a circle, but I though it would be better or more flexible to investigate other methods first ( FFD, MVC and other deformation methods). But rotating the point seems to work fine, and really exact. I might use the FFD deformation if want to have more ‘dynamic/sculpting’ control, for this prototype I just want things to bend say exactly 90 degrees.
Taking the concept I learned while researching the barycentric coordinates further by applying it to 3D cages.
One algorithm I found that seems to work for what I’m trying to do is Free Form Deformation.
That method is very common in a lot of 3D applications but I never took the time to figure out how it works under the hood.
Doing research to find out how to approach a mesh deformer. I think I can use this to create a free form deformation (FFD) deformer:
https://en.wikipedia.org/wiki/Barycentric_coordinate_system
How does it work
In order to deform a point within another shape, we have to remap the point in world space relative to the cage.
Binding.
In this example I use a triangle as the cage, the first step in the process is called ‘binding’, this will loop through all points in a mesh and calculate the coordinates in the cage, once we have those coordinates we can store them and access them later.
Update the cage points.
Change the position of the cage after doing the binding step.
Apply new coordinates of the mesh based on the new cage points
Quick script that I made while reading about how engines converts alembic caches into something that plays in real-time, I guess this happens under the hood when you drag n drop an alembic file with animation into the engine:
Super high lvl:
Create a new skeletal actor instance
Loop over each keyframe and assemble a ‘pose’ (or do every x interval)
Do a diff between the poses and make new blendshapes for them
Assemble everything into a normal skel asset + animation clip.
Wanted to see if I could create a script in Maya that does the same thing:
How it works
Use a mesh as input, and duplicate this for a number of times
Select all of them in the correct order and call cmds.blendShape(), this will all the blendshapes on the first object
Create some animation by setting and keying the blendshapes